Tampilkan postingan dengan label 7. Tampilkan semua postingan

How to Change or Reset Password on Windows XP Vista 7

Most of the times this situation is usually i encountered here at our shop, for the users that forgot their password and for the new user that brought with a second hand computer or laptop with a password within.

Whenever Windows XP / Vista / 7 is installed on a s
ystem, it creates a default account called "Administrator" and by default this account is not password protected. Therefore, if you bought a brand name computer (such as Dell, HP, Compaq or Sony)or you have installed Windows XP yourself. You should be able to login to the computer through the unprotected Administrator account.

Here are the simple ways to access Windows XP / V
ista / 7 with Administrator rights and privileges if you have password protected your User account on your Windows XP system and cant remember the password(s) to login without using a software:

# Reboot your machine.


# Press F8 before the Windows boot screen appears.


# You will be be prompted with a boot options menu.


# Select the Start Windows in Safe Mode option.

# Find the icon for the Administrator user. If the default settings of your system havent been changed, there should be no password for this account.


* The Safe Mode Welcome screen might display some of the other users on your system.

# Login as the admin.


# Press Yes at the prompt asking if you would like to continue using Safe Mode.

# Continue on to the User Settings control panel. Here you can change any of the other passwords for user on the machine. Make any changes you want.

* Control Panel>User Account> "pick the account that you want to remove the password"


# Reboot your computer.

# Login as the user for which you reset the password.


This is useful for many occasions such as if you forget the password to your primary account on your computer but still have access to another 0ne or if you simply want to prank your brother. This has been tested on both Windows XP and Win
dows 7. For this to work you must have access to another account because you have to use Command Prompt or CMD to change the password. Here is how to do it:

* Open Command Prompt (CMD) by going to Start -> Run -> cmd.exe

* Type in ‘net users’.

This will show you a list of all the accounts on the computer. This is just to check and make sure you know the EXACT username of the account you want to change the password for.

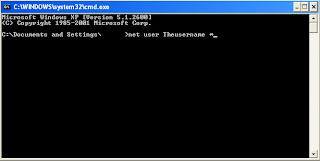
* Next, you need to type in ‘net user (whatevertheusernameis) *


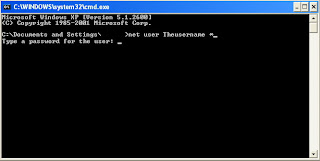
* Next you shall get a prompt asking you for the new password: Finally it shall ask you to repeat the new password, click enter and NOW you have changed the password without knowing the original one.


originally posted: www.edmartechguide.com
Read More..

Samsung Galaxy Tab 3 official with 7 inch display and Android 4 1


Samsung this morning introduced the latest addition to its tablet lineup, the Galaxy Tab 3. The new Galaxy Tab 3 sports a look thats more than a little similar to the recently-released Galaxy Note 8.0, though the Galaxy Tab 3s display is a hair smaller, coming in at 7 inches in size. Heres what the full spec breakdown for Samsungs newest tablet looks like:

  • 7-inch 1024x600 LCD display
  • 1.2GHz dual-core processor
  • 3-megapixel rear, 1.3-megapixel front cameras
  • 8GB/16GB built-in storage, microSD card slot of additional memory
  • 1GB RAM
  • 4,000mAh battery
  • Android 4.1 Jelly Bean

Expect the Wi-Fi-only flavor of the Galaxy Tab 3 to begin hitting store shelves around the globe in May, with a 3G-enabled model (complete with an earpiece for making phone calls) set to follow in June. The 3G Galaxy Tab 3 offers 21Mbps HSPA+ connectivity.

While the newest Galaxy Tab family member doesnt feature a huge spec bump over its predecessor, its been over a year since Samsung first introduced us to that model, meaning that it was about time for a refresh. The Galaxy Tab 3 also serves to bring the design of the Galaxy Tab more in line with Samsungs latest products, the Galaxy Note 8.0 and Galaxy S4.

Theres no word yet on exactly when in May the Galaxy Tab 3 will launch or how much itll cost when it does, but considering its spec sheet and the price that the Galaxy Tab 2 launched at, I wouldnt be surprised if it ends up being fairly easy on the wallet. Stay tuned and well update you once we hear more.

Via Samsung Mobile

 
Read More..

DVD to Nexus 7 Free Put DVD movies to new Nexus 7 with best quality

Description: Do you ever think about converting DVD to Google new Nexus 7 for playback? Go ahead, this article will show you how to convert DVD movie to new Nexus 7 compatible format with best video quality.

The new Google Nexus 7, Claimed as the worlds highest-resolution 7" tablet, is thinner, lighter and faster. It is an amazing device for e-book, music as well as  videos when traveling or being at home. However, the new Nexus 7 tablet cannt play DVD movies because of lacking DVD drive. If you want to free play DVD on your new Nexus 7, this guide will tell you how to do it.

Given that the New Nexus 7 lacks a DVD drive, there does seem to be one big question. Take it easy. There are many DVD ripping software available on the market. In this guide, Pavtube DVD Ripper would be highly recommended. As a professional DVD to Google new Nexus 7 Converter, makes it easy to convert and move DVD movies to New Nexus 7 recognized format. The synchronization of audio and video and superfast conversion speed are also wonderful.

Just a few clicks, you can enjoy your favorite DVD movies on Google Nexus 7 at will.

Download DVD to New Nexus 7 Converter trial version.


(Good news: Pavtube Studio release Free DVD Ripper and Free DVD Ripper for Mac)

How to rip DVD movies for playback on Googles new Nexus 7?
  
1. Load DVD to the DVD to Nexus 7 (2) Ripper.

Insert DVD movies into your DVD drive, then click "Load file" button to navigate to DVD movies you want to convert. And it is able to find and pick the actual main movie up automatically.

After importing successfully, you can go to select subtitle and audio track on the main interface for output.

pavtube dvd to new nexus 7 converter

Tips: If you want to watch Blu-ray movies on New Nexus 7, you arrive a right place. We recommend you the best Nexus 7 (2) Blu-ray Ripper with 30% off to you.


2. Select Nexus 7 (2) compatible format.
  
Click "Format" menu to find the optimized video format for Nexus 7 in the dropdown list, Choosing the built-in "Google Nexus 7 H.264 Video (*.mp4)" under "Android" option is perfect for Nexus 7.

new nexus 7 playback format

Tips: You can press "Settings" button on the interface to adjust the video and audio parameters like codec, size, bitrate, etc. The output videos quality is based on bitrate than resolution. The higher bitrate will result in lower picture quality loss but a larger file size. But there is a balance between quality and size. I think 1500kbps~2000kbps is all right for 720p movies on Nexus 7.

new nexus 7 video settings

3. Start DVD to Nexus 7 (2) conversion.
  
Its time to click "Convert" button to start converting DVD to Nexus 7 (2) compatible format. With the help of technology of CUDA acceleration, you can get 6X faster conversion speed. Just wait for a while, then you can click "Open" button to quickly get the generated files for Nexus 7.

Note: With great decrypting capability, high quality video output and specific format list for versatile portable devices including iPad 3, iPhone 5, Apple TV 3, Xbox, PS3, Android tablets and phones, etc,. Pavtube DVD Ripper ranks top on the list of DVD ripping application. And it also provides lifetime free upgrade of product and technical support.

Now you can watch DVD on that gorgeous screen of Nexus 7 anywhere you like. Just enjoy it now.

Related Article:
               
Read More..

Free Download Connectify Pro 7 1 Full Version With Serial Key


Download Connectify Hotspot PRO 7.0.1 Full Version is an easy to use software router for your Windows computer that lets you transform your laptop into a Wi-Fi hotspot so you can share a single Internet connection - such as wired ethernet, a 3 or 4G card or adapter, even another Wi-Fi network - with your friends, co-workers, and mobile devices. With Connectify Hotspot PRO, you can turn your Windows computer into a real Wi-Fi hotspot that shares that single 3G/4G connection with any other Wi-Fi enabled devices. Youll maximize the value of your 3G/4G card and get all your peripherals online at the same time! 


Connectify Feature:

Share Wi-Fi from 3G/4G Networks – Connectify Hotspot PRO supports sharing Internet from 3G/4G cards in addition to a wide variety of other USB cards and dongles.
Unlimited Hotspot Uptime – No time restrictions, run your Connectify Hotspot 24/7.
Drag & Drop File Transfers – Easily share files of any size, directly to both devices connected to your hotspot, and to other Connectify Hotspot users on the same network.
AutoInternet Selection – Automatically configure your hotspots Internet sharing settings.
Fully Customizable SSID – Name your hotspot whatever you want! (Hotspot Lite requires your hotspot name to start with Connectify-)
Dispatch Integration - Share your Super-Fast Dispatch Connection with Connectify Hotspot PRO.

How To Install
1: Launch the Connectify Installer
Launch the Connectify Installer that you’ve just downloaded, by double-clicking the installer’s .exe icon or launching it directly from your browser’s download manager.
2: Run and Confirm
Click ‘Run’ if Windows asks ‘Do you want to run this file?’ and ‘Yes’ when the Windows User Account Controls menu asks ‘Do you want to allow the following program to make changes to this computer.
3: Agree and Install
Simply press ‘I Agree’ on the Connectify installer’s License page to install Connectify Hotspot. Upon completion, Connectify will be running in your system tray down by the clock.
DOWNLOAD NOW[Application 7.1]
DOWNLOAD NOW[Serial Key/crack PART 1]
DOWNLOAD NOW [Serial Key/crack PART 2]
or
DOWNLOAD NOW[Application 5.0]
DOWNLOAD NOW[Serial Key] 
Read More..

WINDOWS 7 ALL VERSIONS 48 FULL ACTIVATED

List Windows 7 48in1:
(01) Windows 7 MSDN Ultimate 32-bit
(02) Windows 7 MSDN Professional 32-bit
(03) Windows 7 MSDN Home Premium 32-bit


(04) Windows 7 MSDN Home Basic 32-bit
(05) Windows 7 MSDN simplified version of 32-bit
(06) Windows 7 MSDN Ultimate 64-bit
(07) Windows 7 MSDN Professional 64-bit
(08) Windows 7 MSDN Home Premium 64-bit
(09) Windows 7 MSDN Home Basic 64-bit
(10) Windows 7 OEM Ultimate 32-bit general-purpose
(11) Windows 7 OEM Universal Professional Edition 32-bit
(12) Windows 7 OEM Home Premium 32-bit general-purpose
(13) Windows 7 OEM Universal Home Basic 32-bit
(14) Windows 7 OEM Vervison of 32-bit general-purpose summary
(15) Windows 7 OEM Ultimate 64-bit general-purpose
(16) Windows 7 OEM Universal Professional Edition 64-bit
(17) Windows 7 OEM Home Premium 64-bit general-purpose
(18) Windows 7 OEM Universal Home Basic 64-bit
(19) Windows 7 Ultimate Lenovo (support Thinkpad) 32-bit
(20) Windows 7 Ultimate Lenovo (support Thinkpad) 64-bit
(21) Windows 7 Ultimate 32-bit Dell
(22) Windows 7 Ultimate 64-bit Dell
(23) Windows 7 Ultimate 32-bit HP
(24) Windows 7 Ultimate 64-bit HP
(25) Windows 7 Ultimate 32-bit Compaq
(26) Windows 7 Ultimate 64-bit Compaq
(27) Windows 7 Ultimate 32-bit Acer
(28) Windows 7 Ultimate 64-bit Acer
(29) Windows 7 Ultimate 32-bit Asus
(30) Windows 7 Ultimate 64-bit Asus
(31) Windows 7 Ultimate 32-bit BenQ
(32) Windows 7 Ultimate 64-bit BenQ
(33) Windows 7 Ultimate 32-bit Founder
(34) Windows 7 Ultimate 64-bit Founder
(35) Windows 7 Ultimate 32-bit Shenzhou
(36) Windows 7 Ultimate 64-bit Shenzhou
(37) Windows 7 Ultimate 32-bit MSI
(38) Windows 7 Ultimate 64-bit MSI
(39) Windows 7 Ultimate 32 Samsung
(40) Windows 7 Ultimate 64-bit Samsung
(41) Windows 7 Ultimate 32-bit Sony
(42) Windows 7 Ultimate 64-bit Sony
(43) Windows 7 Ultimate 32-bit Toshiba
(44) Windows 7 Ultimate 64-bit Toshiba
(45) Windows 7 LG Ultimate 32-bit
(46) Windows 7 LG Ultimate 64-bit
(47) Windows 7 Ultimate Fujitsu (Fujitsu Siemens support) 32-bit
(48) Windows 7 Ultimate Fujitsu (Fujitsu Siemens support) 64-bit


Note:
Burn .ISO to DVD.
Boot DVD and choose your Windows version.


Read More..